 40 Order Number Eleven
Imagine my surprise when I opened Civil War Quilts on a Saturday morning and found that the block for that week was the first applique block that I did in my class last August. That class taught the back basting applique method. I was no longer feeling incompetent as I tackled Block #40. I had already practiced. Here is how I did this block.
 Here is the pattern which I received from Jeana Kimball in her class. Fortunately is was just the right size. I cut the background fabric for my block adding a generous 1/2 inches. Once the applique was finished, the excess would be trimmed off. I folded the block in half each direction hand pressing a fold so that I could center the pattern. I then traced the pattern on the wrong side of the block.
 Starting with the fabric which would be on the bottom of the finished applique design, I placed a large square of the fabric on the right side of the block base with the right side facing out. (Wrong side to right side of base block.) I then basted through both fabrics ignoring the lines for the second fabric which would be the top fabric.
 After the basting is completed, the excess fabric is trimmed away leaving a scant 1/4 inch.
 Next find a fairly straight section of basting and clip to the basting line to begin the needle turn of the fabric clipping about every third stitch of basting as you go, pulling out the basting thread, and clipping the fabric as needed at the curves. Turn at the basting line and then attach the top fabric to the base fabric using the applique stitch.
 You will find that your stitching line will match almost exactly the traced line. Now take a large swatch of the second fabric and baste it to the base fabric as before.
 The front will look like this.
 After the basting is complete, trim this design as before - a scant 1/4 inch from the basting thread.
 Note that the red fabric design is all one piece as will be the top blue design. Work carefully to keep the point.
 The front side will look like this.
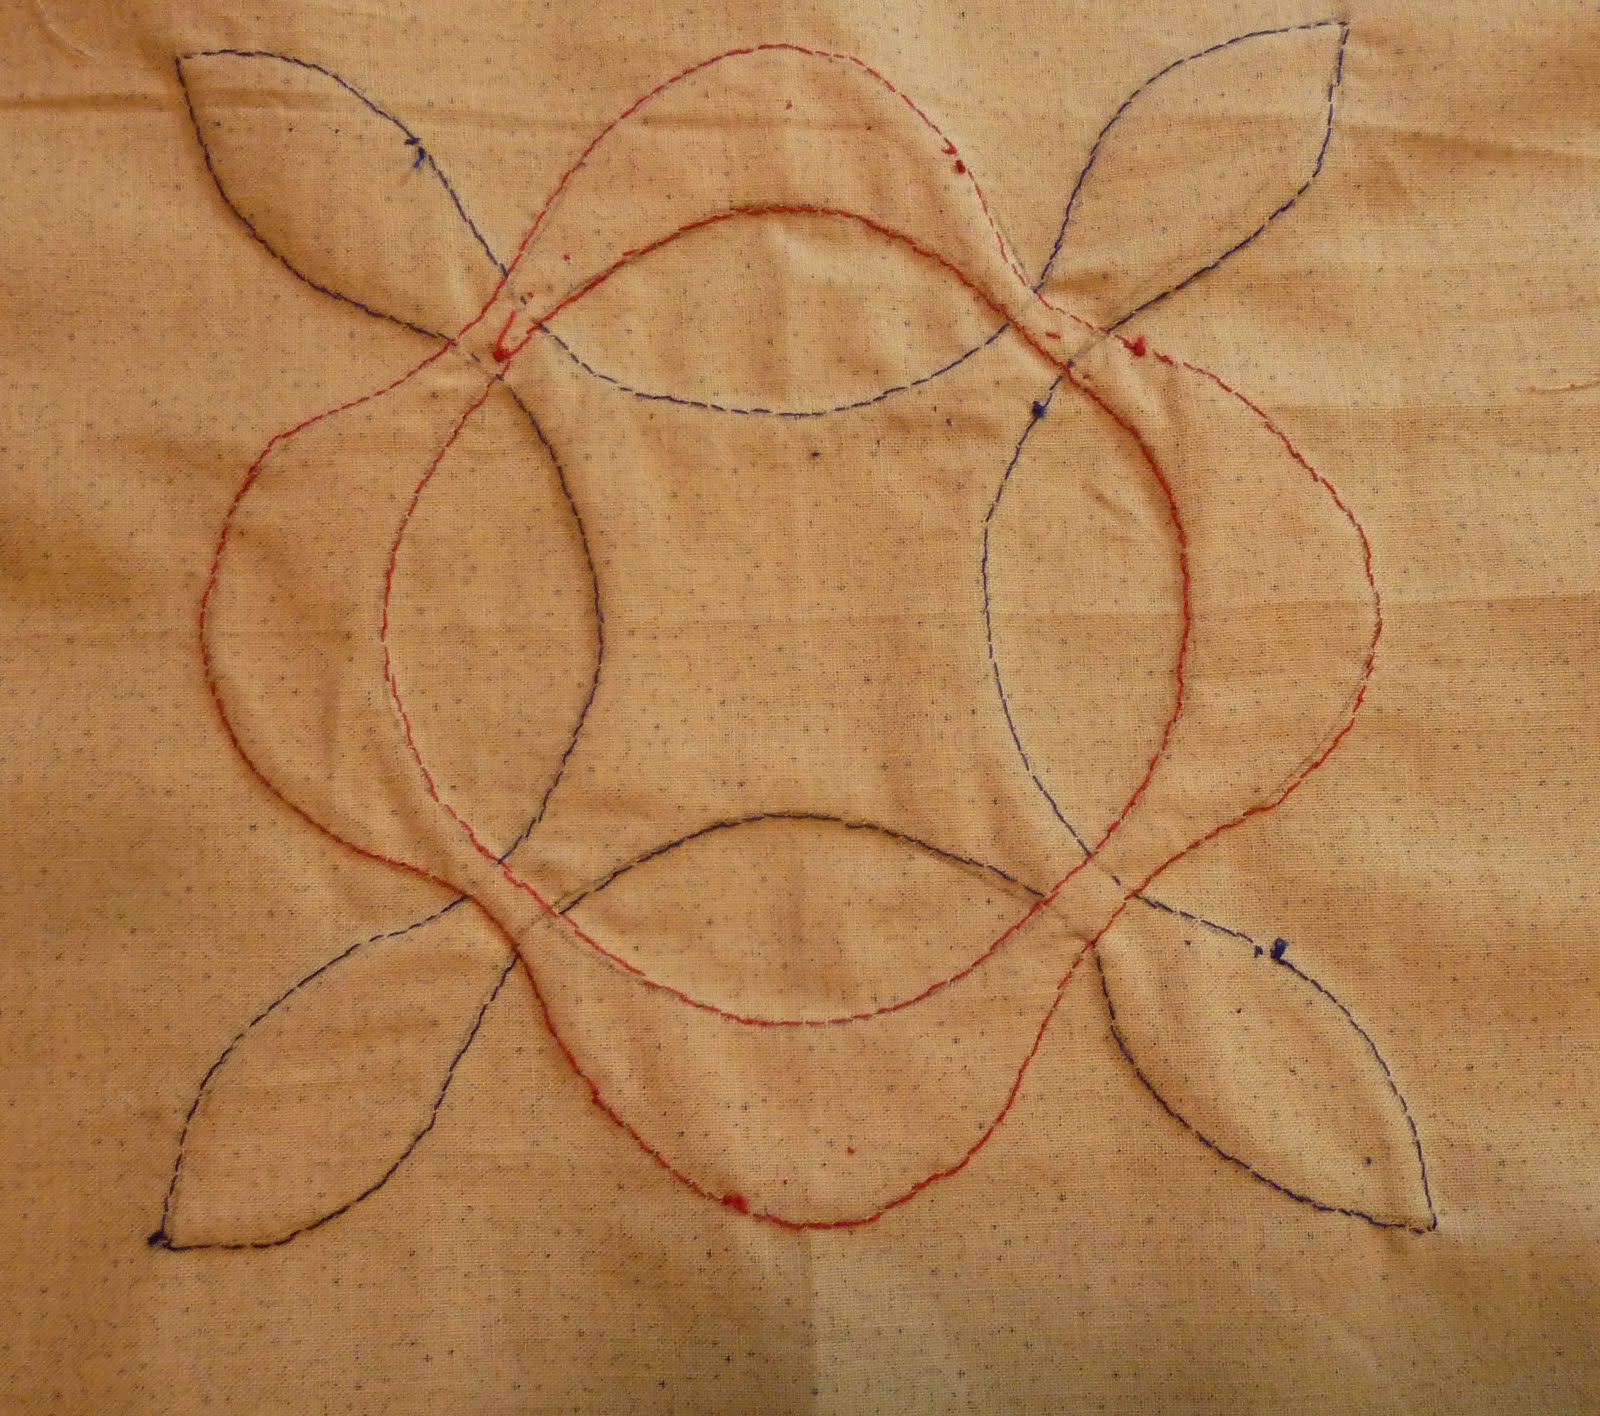 And the back will have the colored thread stitches sitting right on top of the initial tracing lines. EASY!
 I was so excited that I decided to applique Block 41 as well.
 41 Red, White, and Blue Quilt
The directions called for piecing the star and there were lots of "Y" seams. At this point, I thought the applique would be easier. I might try hand piecing this block later.
(LaNell, thank you for the star background fabric. I just had to use it for this block!)
 This week, the second pattern and fabric for "Aunt Grace's Garden Party" quilt arrived. Have I told you how happy the fabric for this quilt makes me? I saw the flower baskets with the appliqued handle and it reminded me of Block 13 of Civil War Quilts.
 13 Little Blue Basket
My block now has a little blue handle. I may also have to revisit Block 3, Seven Sisters and applique those 7 stars after all.
1 comment:
Thanks so much for all the pictures showing how you did your appliqued block - you made it look so simple! I look forward to trying it myself!
Post a Comment